
Does your monthly to-do list contain assembling a kitchen, by chance? We’re not going to lie, you are in for a lot of work, but at least you will be in complete control of the project and save money. If you are not quite sure what to do, don’t worry. Check out the steps you need to finally move things along and get your dream kitchen layout.
If you stay with us till the end, as an added bonus, you will also learn how much it costs to fit a kitchen. This will help you figure out whether there is any need to start a DIY project or you can simply delegate the task to an experienced professional. Read on.
How to Fit a Kitchen Yourself
Fitting a kitchen is not an easy job but it also isn’t impossible if you know what you are doing. Most units come with instructions on how to put them together and if you are consistent, you can do it.
Before you begin, you have to rip out all the old units. Tumbling down fixtures may be a challenge if the materials are sturdy but when you are dealing with an old kitchen, the struggle is less obvious. If you don’t feel like doing this yourself, you can have it completely removed by someone else but that will cost you extra greenbacks.
Now, you might want to bring in a qualified electrician or plumber to inspect the installed wiring and water supplies for faults. If you don’t think this step is necessary, you can skip it. It’s your own kitchen after all. But it’s better to strive for prevention than leave things to chance. While you are at it, make sure that whatever appliances or units you move around the kitchen don’t damage any existing gas supplies, electrical sockets, water supplies, waste and pipework.
Now, if you want to redo the floors and walls (whether paint or wall tiles), you have to start from this step before you bring anything else into the room. Once you are done with that, it’s time to fit your own kitchen.
DIY kitchens don’t assemble themselves. You need to have some tools handy, including but not restricted to:
- Screwdrivers
- Circular saw
- Spirit level
- Measuring tape, masking tape
- Wall plug
- Pencil
- Electric drill and drill bit
- Corner posts for your wall unit pieces
Fitting Your Own Kitchen Units

Without a doubt, you will need to put a lot of elbow grease into assembling the base and wall units, as well as the worktops. Much more than it takes to add a fresh coat of paint or replace the electric appliances. So, what are the steps?
New kitchen base units and marked positions on the wall
Step one is to measure the space out. You need a pencil, measuring tape, and a spirit level to make marks on the walls for your new kitchen base units. Find the highest point of the fixtures on the wall and mark its position. If any of these have legs, remember to count them in.
When you have finished marking the surfaces, move the kitchen base units in the kitchen one by one. Needless to say, you should start in a corner and work your way around the room. Ensure that you hit the marks on the wall so that each item is aligned perfectly and level. Screw every element one by one and watch out for any gaps you may be leaving along the way. It will be useful to employ corner posts for the job.
Take into consideration the fact that walls are rarely completely square and level, so when you push those kitchen base units to the wall, it should not come as a surprise if one edge doesn’t always touch the other.
Then, screw the kitchen base units to the wall with plasterboard fixings or wall plugs for masonry. Finally, add the kitchen plinths. They give your cabinets a finished look by covering the legs. If you need to cut the material so it fits the designated space, employ masking tape to protect the surface.
Before you move on to the other stuff, make sure the base cabinets are inline across the front edges and positioned at the same height. Follow the level line you marked at the beginning with the spirit level.
Wall units with wall brackets
Mark the space out for the wall units using the same tools you did for the previous measurements. Your spirit level will come in handy to ensure that there is a horizontal line on the wall, which will serve as a reference point when you are mounting the wall units. Don’t forget to allow clearance between the bottoms of the wall units and the worktops. The distance should be at least 40 cm.
The way to attach the kitchen cabinets exactly where you want them is to first secure wall brackets to the wall. They will hold the wall units in place. You need one in each top corner, which means a total of two.
The next step is to hook the units. Check out if they are level and make any corrections as needed. Repeat for other units and then stick them to one another.
Cabinet doors
With that out of the way, it’s time to screw the cabinet doors on. Some doors, you will see, arrive with pre-drilled holes for the hinges, which makes the installation process a lot easier. If there are holes, all you have to do is attach the hinge plates to the doors with a screwdriver and the screws provided in the package, and then attach the doors to the units.
If no pre-drilled holes can be seen, you should go through the instructions of the package to find out where the hinges should be placed. Bear in mind that some hinges come as one piece. In that case, the right thing to do is to secure them to the door before you affix them to the cabinet.
Drawer runners
Screw the angle component of the roller runner to the front panel. Drill holes in the drawer where the runners will go. The exact position is based on the height and length of the drawer, so you had better run it by the manufacturer.
Worktops
When you have all the units in place, the last step is to add the worktop. Now, this is a tricky job that you may want to leave to the professionals, especially if you are going for composite, stone or timber worktops. For laminate, you could do the task yourself. Check the manufacturer's instructions for all the details on how to install the pieces properly.
Sometimes the ends may have to be trimmed so they can fit the allocated space between the wall and other units. You will need protective goggles to cut the surface but first make sure to mark a cutting line on it so you know what you are doing. Double-check your measurements before you proceed to any work.
If your new kitchen set contains end panels, you should place them where they belong. In most cases, they are the same height as that of the cabinets but not always the same width. Most end panels go down to the floor. They add a professional finish to the look.
When you have installed all the cabinets, you can apply that final coat of paint to the walls (if that’s part of your plan). After that, it is important to lay out your freestanding appliances as well.
How to Fit a Fridge-Freezer

If your fridge-freezer has a water dispenser, you have to hook it up before you can use the appliance. Here are the steps to do that. First of all, you want to make certain your fridge is disconnected. Turn off your water supply.
Start by unscrewing the water connector that is located at the back of your appliance. Grab your water filter and check the water flow direction to ensure that everything is going well. Attach the connector to the end of the water hose and then put back the connector (with the hose) back where it was before. Then, simply screw the connector with your hands. Voila. You’re done.
Now, you may also want to fasten the filter to the wall. To do that, push the white wall brackets into the filter, place it against the wall, right where you want to install it, and make some markings for the holes.
Next up, remove the wall brackets from the filter and put them back against the wall and over the marked positions. Screw the brackets using an electric drill. When you are finished, pop the filter back into the brackets.
It’s time to connect the water filter to the water supply. There should be a tap adapter into your fridge package. It works for two different sizes of water supply taps. Attach the tap adapter to your water supply and then detach its connector at the bottom end. Place it onto the end of the water hose. Then, screw the hose into the adapter and follow up by tightening the connector.
When it’s all done, turn the water supply on. Double-check that no leakage occurs from the pipe onto the wall or floor. If necessary, place a bucket under the tap to ensure the area remains dry. Don’t forget you should filter through some water before you can use your new filter (8-10 glasses should suffice). Skim through the package directions for this step.
How to Install a Sink Unit
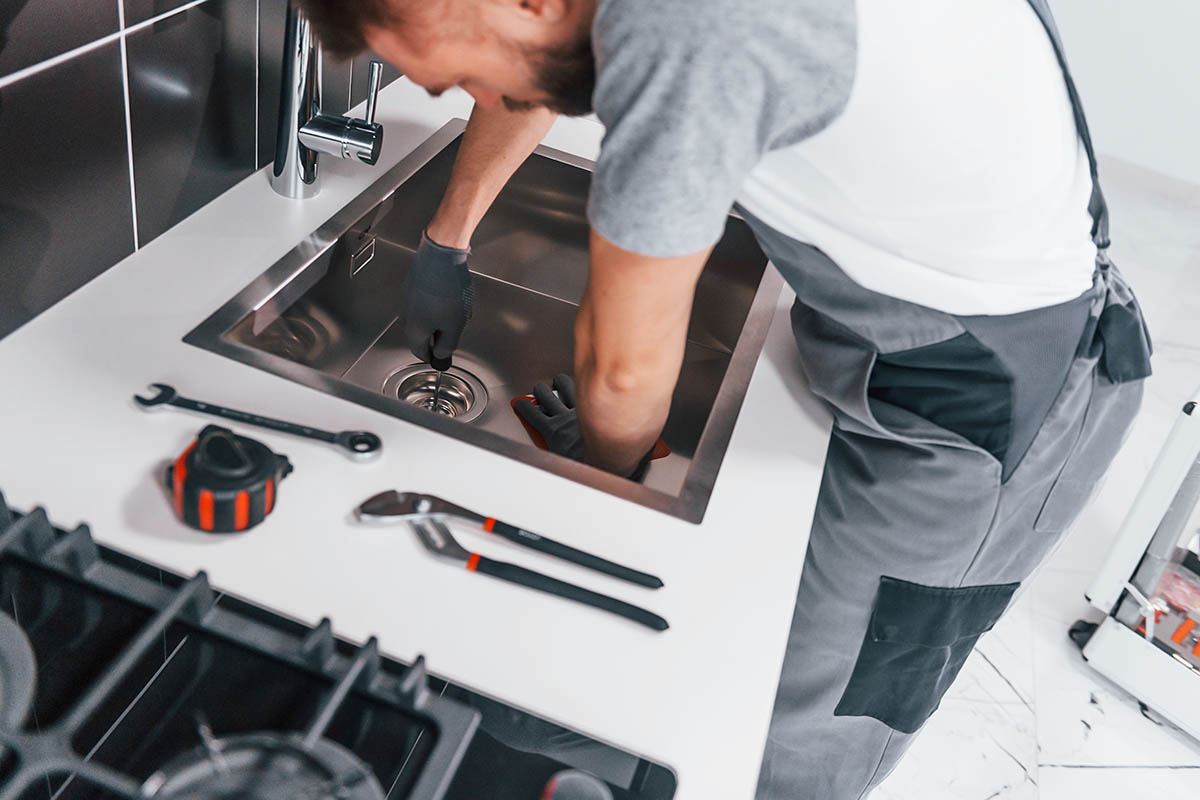
Please use these directions as your overall guidelines. It goes without saying you ought to read the manufacturer’s instructions carefully before you undertake assembly. Turn off your water supply and follow along with the next steps.
Usually, you will start by attaching the foam sealant strips under the inside edge of the sink unit. (Basically, you turn the unit upside down for this task.) To secure it in place, add some silicone to it and stick the fastenings that came with the package, two on each side. Let it sit for a while. Go back to it and put the sink in the kitchen worktop. You want to tighten the fastenings one by one (careful not to over tighten them, though).
The next step is to place the worktop over the base unit as you normally would. An important thing to remember is to connect the pipes of the sink with the existing supply pipes. Again, refer to the official instructions for help.
How to Install Your Washing Machine
As always, you want to first get rid of your old appliance. Unplug it and move it out of the way. Shut off the water supply. Unscrew the cold water pipe.
Your first job is to unwrap your appliance and take out everything that has been dumped in the drum compartment. Then, remove the transportation bolts that were put by the manufacturer for safety reasons. Once your machine arrives, they don’t belong there anymore. So, take them out (plus the whole fitting and the rubber).
Now, take the hose. It has two ends. The 90-degree connector is supposed to go into the appliance. It can be fit by hand. Screw the other end to the water supply pipe. Turn the water on to inspect for leaks and if everything is up to par, proceed with the other steps.
Next comes the outgoing wastewater pipe. Use the connector it comes with to screw it to the water pipe under your kitchen sink or in your bathroom - wherever your appliance is going to be placed.
Once these steps have been followed, you can secure the appliance in its place by adding the adjustable feet. Verify that it’s perfectly level with the floor. If necessary, turn one screw to get the desired results. It’s a good idea to leave some space between the back edge and the wall.
How Long Does it Take to Fit a Whole Kitchen?
It is difficult to put a specific timeframe on a new kitchen installation because no project is the same and the size of the job is a determining factor. But generally speaking, it takes anywhere between 3 and 6 days to assemble all the units and fixtures you need.
That being said, if you are doing everything on your own and you have little experience in this area, it may take longer to finish off all tasks. The first unit usually takes the longest to put together but once you have your assembly technique in place, a good workflow will be established and the fitting process will be fairly straightforward.
How much to Have a Professional Fitter Assemble Your Kitchen in Surrey?
Installing an average-sized kitchen in the UK costs roughly £1,500 but the numbers can vary from area to area and company to company. Fitter services in Surrey are a little bit more expensive, so you may end up paying more. But of course, that will depend on the size of the new kitchen you want to fit. The bigger it is, the higher than £1,500 you go (£5,000 and up).
As well as that, the more elements you put in the DIY projects, the greater the cost. A fitter usually charges £120- £240 per day, hence the bill will depend on the number of days they spend on the project. If you need plumbing and electrical work done, this will add to the final estimate.
The price can be broken down into separate jobs, such as:
- Installation of kitchen units (worktops) - £200-£450 per job
- Installation of kitchen units (cabinets and doors) - £40 per base and wall unit
- Floor fitting - £400-£1,000 per job (fees depend on the size of the room and type of flooring
- Affixing ceiling light - £125-£150
- Installation of kitchen sink - £160-£210
- Installation of washing machine - £45-£65
- Installation of extractor fan - £190-£220
- Underfloor heating assembly - £130-£165 per square metre
- Installation of a radiator - £300-£360
- Gas supply/installation of gas appliances - £400- £1,200 (for more complex connections)
To figure out whether a technician is a right fit for you, you had better check out their previous work, which they should have records of in the form of before and after photos, customer reviews, and personal recommendations. If they are reluctant to show you proof of their expertise, you should move forward.
Sometimes a busy schedule speaks volumes about someone’s skills, but don’t let this be your only assessment measure.
Also, keep in mind that some people will charge far more than what the average fitter will. To secure the best price, get quotes from three different companies and compare the figures.
Please note that the above costs are ballpark. To find out how much you are going to have to pay, do your own research by contacting your desired provider in Surrey. If you can’t afford the expenses, you can still go with DIY kitchens, base units, and walls. Want to read more? Head on here to find out how to revamp your kitchen cheaply.